In order to perform this type of recording, you will need to install one of the latest version of the DVICO recording software (3.5 is recommanded, but 3.6 should work fine). You might need to consult this thread in regard to some msvcrt71.dll errors when shutting down the DVICO recording software. If you had been using the DVICO tuner in OTA mode, you should seriously consider reinstalling it in QAM mode using the KAXKID procedure.
When configuring the fusionHDTV application, select the recording format as .TP, make sure the default recording folder is monitored by BTV and configure the FusionHDTV Agent to close the FusionHDTV application after each recording.
While BTV-Externinator can provide the list of channels in your various lineups, it is recommended to schedul a recording job on each unencrypted QAM channels available (using the DVICO scheduller). In the following steps you will make use of those.
You will need to make sure that you have a lineup that contains all the channels of interest, this is usually the digital cable lineup (premium/extended). If you don't have such a lineup, you should either run the BTV wizard to add the lineup, or go directly to SnapStream.net to add it.
Go to the web admin in order to create a new unencrypted QAM channels lineup. For that, use the "save as new" option on an existing lineup (step 3) and hide all the unavailable channels. It might be faster to simply use the "hide all" and then uncheck the ones that you can actually receive. Be sure to use the "Save and Exit" when you are done. At this point, you should force a Guide update, so that BTV can get the updated lineups.
Extract the content of the latest version to a folder of your choice (i.e. C:\Program Files\BTV-Externinator or something else). Execute the file BTV-Externinator.exe. Go to the Configuration tab, Parameters sub-tab. This is where you provide the informations to connect to the BTV-Server, the language file to use (English2 and French2 included) and the auto-refresh timer (in hour).
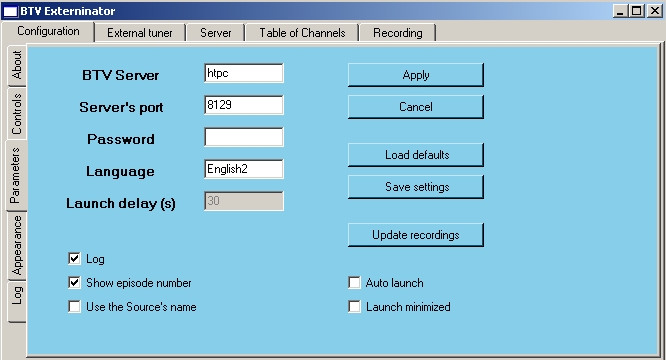
You can load/save the configuration file from this tab. When using the Auto-launch feature, you can set a delay to make sure that BTV has time to load after a reboot (or switching on the PC). The log file is usefull for debugging purposes and to keep track of what BTV-Externinator has done...
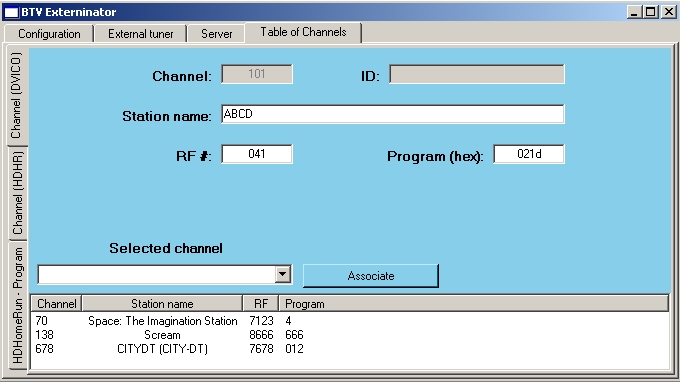
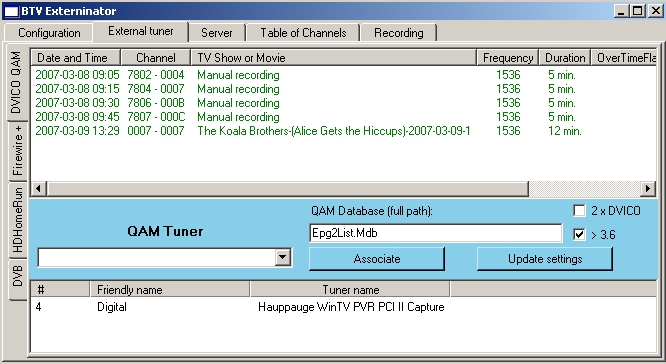
Now you need to associate the lineup from step 4, to the channels where you schedulled recording jobs in step 2. This is done by launching BTV-Externinator and going to the Table of Channels tab, DVICO-QAM sub-tab. Using the External recording tab, DVICO QAM sub-tab (shown in step 8), enter the full path to the database used by the DVICO software to schedul recordings. By using "Update settings", this will force a read of the database. The Channel column will give you the RF channel (i.e. 8666) and Program number in hexadecimal (i.e. 666) corresponding to each channel. You can then fill out the Channel map with that information, by selecting a Channel from the drop-down menu, entering the RF and Program values, then hitting the "Associate" button. Of course there are other methods of obtaining that information, but this seems like the easiest one (keep in mind that the RF Channel corresponds to 7000 + digital channel and the program number is in Hex).
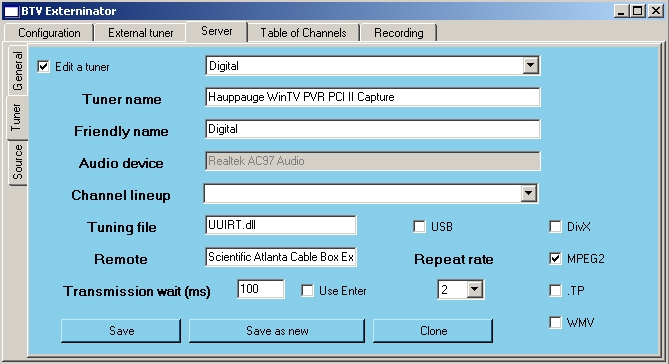
Now this is how we fool BTV into schedulling recording jobs on the unencrypted QAM channels... We need to create a virtual capture device for the DVICO-QAM tuner. To do that, go to the Server tab, Tuner sub-tab. Select an existing capture device from the drop down list and check the "Edit a tuner" box. After that, change the friendly name of the tuner, change the associated lineup and so on (recording format will be extracted from the registry). Using the "Save as new" option, you create a new virtual capture device, unrelated to any real capture devices. You should either reboot the BTV server or at the very least shutdown and restart BTV in order for the modifications to take effect. WARNING: virtual capture devices should not be edited/reordered through the web admin or BTV wizard!!!
The first step consists in selecting the virtual capture devices to monitor. To do that, select the virtual capture device from the drop down box and press the "Associate" button, the capture device will be shown at the bottom. If you are running multiple DVICO cards from the same database, you can enable "2 x DVICO" to bypass the check that prevents adding conflicting entries to the database... You do need to keep BTV-Externinator and the FusionHDTV tray application running, in order for those recordings to happen. Support for the DVICO software version 3.6 is still in development...
On the Configuration tab, the Controls sub-tab contains things common to the various External recordings.
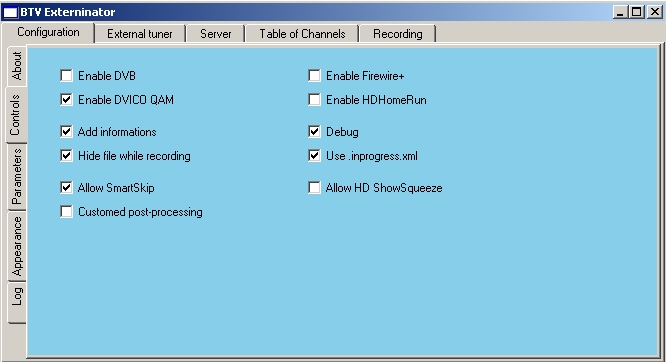
You can disable the External recordings that you are not using, this will remove the corresponding sub-tabs. The other options are: